Site Server - local cache & Network Boot
An optional Windows box on a customer LAN that does two things: it caches CloudImage content so the first device pulls each WIM / driver / app from the cloud and every subsequent device on that LAN gets it at LAN speed, and it can network-boot devices into CloudImage with no USB. Both are a big win for ransomware-recovery scenarios where you are rebuilding many machines on a bandwidth-constrained site.
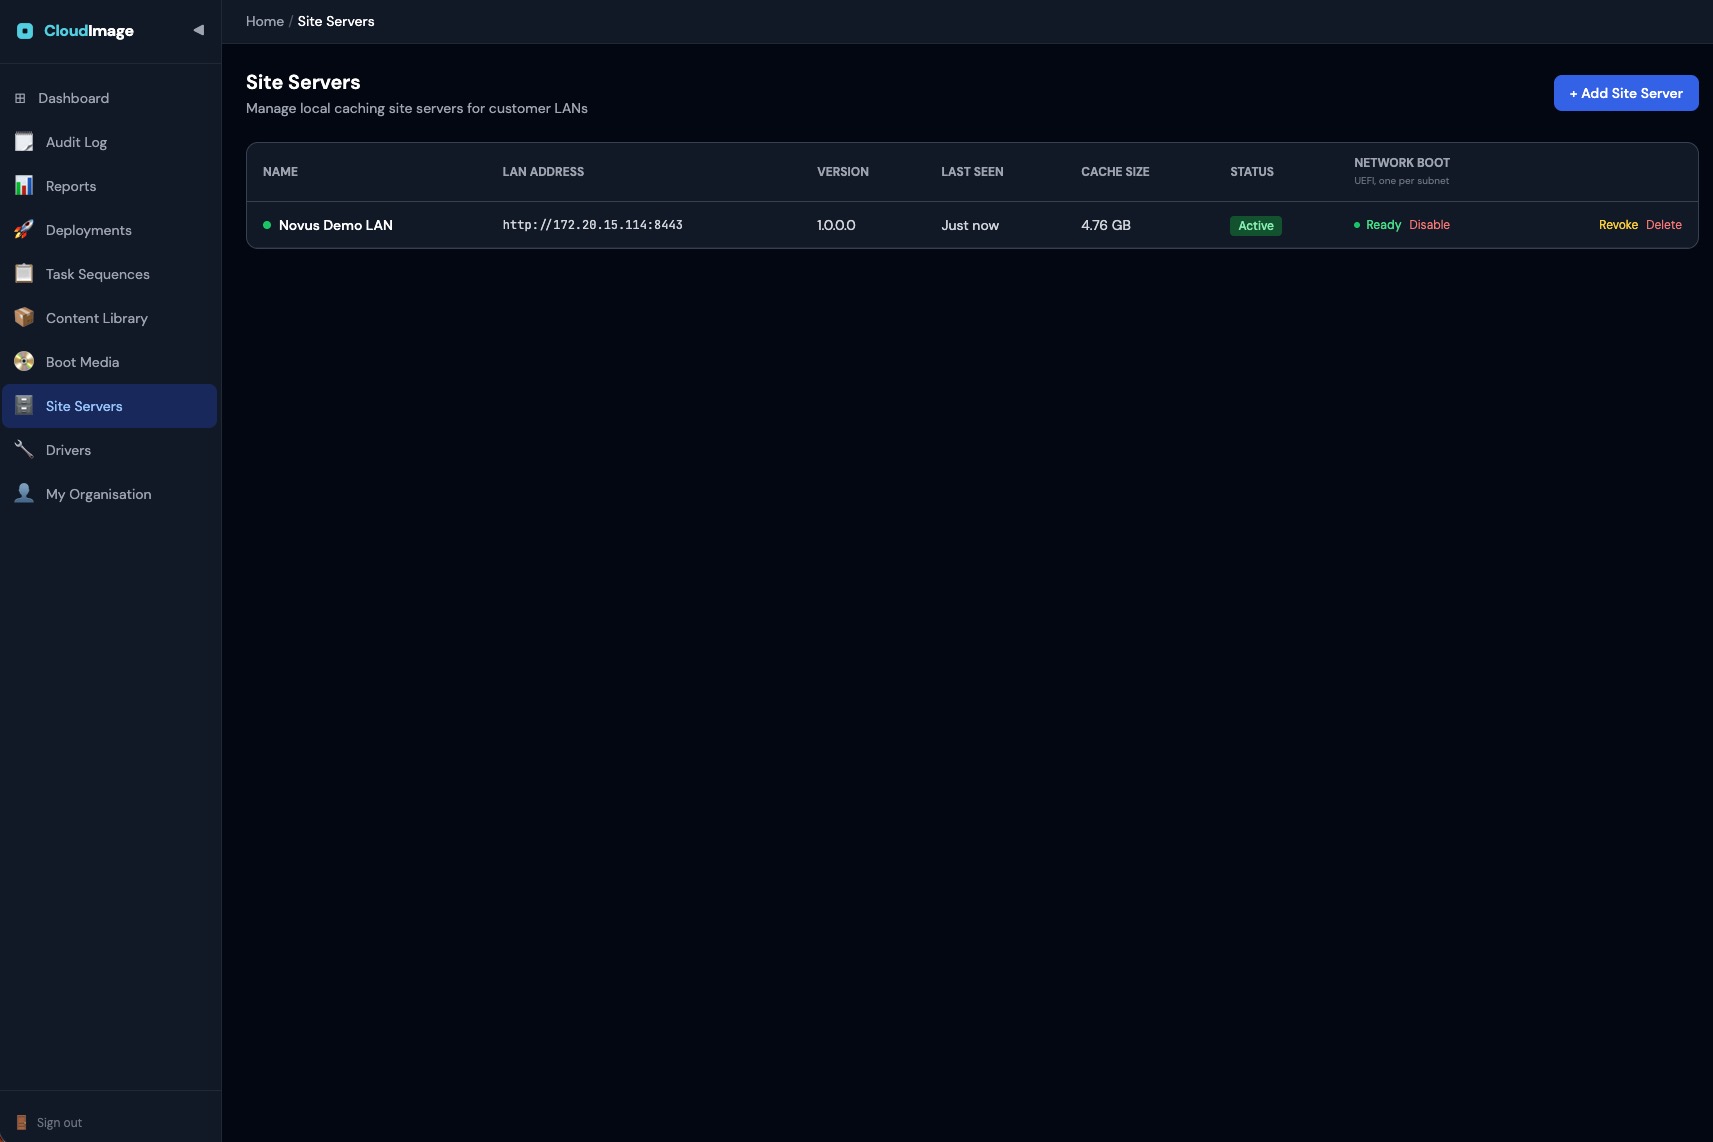
What it is
- A lightweight Windows service (
CloudImageSiteServer) that runs as an HTTP content proxy on port8443(configurable). - Runs on any Windows box - Server or client OS. No WDS or special roles required.
- Lazy cache: fills as you deploy - no pre-seeding needed.
How devices use it - automatic
You do not rebuild or reconfigure boot media. Any device imaging on that LAN (with normal cloud boot media) checks in with the cloud, discovers the site server, and routes content through it automatically, with fallback to the cloud if the server is absent or unreachable. Trust is anchored in the cloud check-in - the device only uses a server the cloud confirms is a registered Site Server for your tenant. Only the large content downloads route through it; the control plane stays on the cloud.
Multiple sites - a Site Server per location
A single organisation with several locations - e.g. a Trust with a Site Server in each school - can run one Site Server per site, all under the same tenant. Each device automatically routes through its own local Site Server, never another site's:
- On deployment, the device finds the Site Server on its own LAN (via a local broadcast) and uses that one - so School A's devices cache through School A's server, School B's through School B's. No per-site config, no separate boot media.
- The choice is cloud-verified: the device only trusts a discovered server the cloud confirms is a registered Site Server for your tenant, so a rogue device on the LAN cannot hijack the download path.
- If no local server answers, it falls back to the cloud so the deployment always completes.
Just install a Site Server at each location (each with its own enrolment token and a static LAN IP). They all appear in the portal Site Servers list, and each location's devices use their local one automatically.
Setup
- Portal → Site Servers → Add Site Server. Copy the one-time enrollment token that's shown, then click Download installer - the installer and your enrolment token are on the same page (also available from the Site Servers list via Download installer), so there's nothing to request separately.
- On a Windows box on the customer LAN (give it a static LAN IP), run the installer as Administrator:
This installs thepowershell -ExecutionPolicy Bypass -File .\install.ps1 -EnrollToken "<token>"CloudImageSiteServerservice (HTTP :8443), opens the inbound firewall port, and starts the service. Give the box a static LAN IP - the Site Server is referenced by its IP for both caching and network boot. - Verify: the portal Site Servers row shows Last seen, version, and LAN address (this appears after the first heartbeat - allow ~5 minutes); and
http://<box-ip>:8443/healthzreturns status andcacheBytes. The cache is served over HTTP - trust is anchored in the cloud check-in, not a TLS cert - so usehttp://, nothttps://.
Test it
- Image device #1 on that LAN. Watch
cacheBytesgrow on/healthz- the device pulled content from the cloud and the server cached it. - Image device #2 with the same task sequence. Content comes down at LAN speed (cache hit). The deploy log shows
Using local site server cache at http://<ip>:8443 (discovered on LAN, cloud-verified)and(via site server cache: http://<ip>:8443).
Notes
- Upgrade: re-run
install.ps1with no token. Config, cache, and TLS cert are preserved. - Internet still required: the first pull per content item goes cloud → site server → device. It's a cache, not an offline mirror.
- Firewall: the installer opens TCP
<port>automatically (idempotent Windows Firewall rule). If firewall cmdlets are unavailable the installer logs a warning and continues - open the port manually in that case.
Network Boot (image devices with no USB)
A Network-Boot-enabled Site Server boots devices into CloudImage WinPE straight over the local network - no USB stick, no ISO, no WDS. Ideal for mass ransomware recovery: rack up the devices, network-boot them all from the one Site Server, and image in parallel.
How it works: the Site Server answers UEFI network-boot requests on the LAN as a proxyDHCP responder - it coexists with the customer's existing DHCP and never hands out IP addresses. A booting device loads CloudImage WinPE from the Site Server's cached base image, discovers the Site Server, and pulls its per-customer config automatically - then images exactly as a USB boot would, with the same task sequences, branding, and licensing.
- No USB, no WDS - the Site Server is the boot source. One Network-Boot Site Server per network subnet; UEFI x64 devices.
- UEFI Secure Boot supported - CloudImage serves a Microsoft-signed boot chain, so devices with Secure Boot enabled boot without disabling it or enrolling custom firmware keys.
- Same golden image - the CloudImage WinPE image is reused; the Site Server caches it and keeps it current automatically.
To enable: the Site Server must be on the Network-Boot build (the boot binaries are included). Then Portal → Site Servers → your server → Network Boot → pick the golden WIM → Enable. The status moves Enabled → Ready once the image is cached and the boot responders are live. Set the target devices to UEFI network boot and they load CloudImage automatically.
DHCP options - two ways to point devices at the Site Server
Network Boot works with whatever DHCP the site allows:
- proxyDHCP (default, zero DHCP config) - the Site Server answers UEFI network-boot requests alongside the existing DHCP server without handing out IP addresses. Nothing to change on the customer's DHCP.
- DHCP scope options - where the network team prefers to configure it on their DHCP server, set option 066 = the Site Server's LAN IP and option 067 =
ipxe-shim.efi. On non-Windows DHCP the IP goes in the next-server field instead of option 066.
Three ways to boot a device: USB, ISO, or Network Boot. Network Boot is fastest when you're imaging many machines at one site.